

How To Remove Flow Restrictor From Moen Shower Head
If y'all have a flow restrictor in your showerhead, then y'all are using less water for your bathtimes. According to experts, these devices reduce the water flow from your showerhead to 2.5 gallons per minute.
Although this is a great idea, the restrictor tin can become a shower time nightmare, particularly in areas with low h2o pressure level. Here, these items turn an platonic shower spray to an annoying trickle of h2o, making information technology difficult to rinse your trunk.
You can accept out the period restrictor to solve this problem, only you might have to pay more for your utility bills. Are you willing to spend the actress cash? Hither are easy steps to remove flow restrictor from shower head fittings.
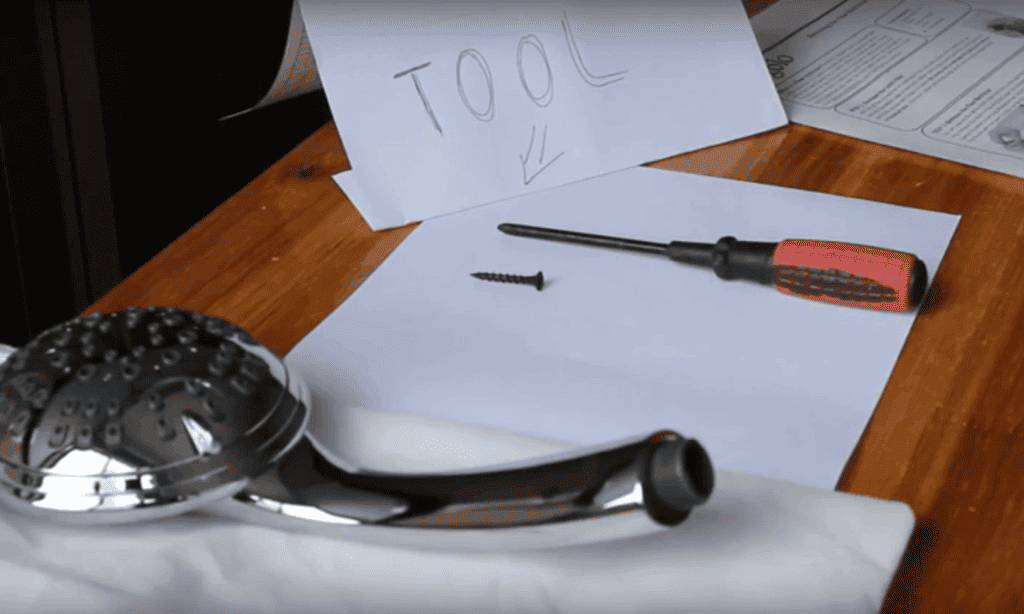
Before you lot get started, ensure you have the required tools in place. These include:
- Adaptable/pipe wrench
- rag
- some newspaper clips
- needle nose pliers
- Teflon record
Permit's utilise these tools in the post-obit guide.
How to Remove a Menstruum Restrictor from an Embedded Shower Head
Many homes accept this type of shower head. With these steps, you lot tin can handle extract the restrictor with ease.
Step 1: Remove the Head
Locate the bent pipe or shower arm and connector nut that sticks out of your bathroom wall. Wrap both parts with a clean rag to protect them from scratches.
Hold the arm firmly with a pipe wrench and loosen the connector nut with an adaptable wrench. Loosen until the head is removed from the shower arm.
Pace 2: Extract the Restrictor
Look for the washer within the connector nut. Hither this particular offers a tight seal and secures a mesh filter or screen. Commonly, both items have to be extracted before you tin can see the restrictor.
Gently have out the washer with needle-nose pliers. Remove the screen past tapping the bottom of the head with your palms. If the screen is stuck, utilize the pliers to remove the item.
Pull out the flow restrictor with a flat-head screwdriver. If y'all don't know what a restrictor looks like, it's a plastic disk with any of the following colors such equally white, green, pink, and red.
Pace 3: Fix Up the Showerhead
Return the screen to its original position. Gear up the washer and push it with your fingers to prevent it from falling off. Take out the existing Teflon tape from the linear grooves on the shower arm. Wrap fresh tape around the threads in a clockwise direction.
Secure the connector nut by tightening it with your hands. When the nut is firmly placed, wrap a rag around the nut and arm, then grab the arm with the pipage wrench. Utilise the adjustable wrench to turn the nut.
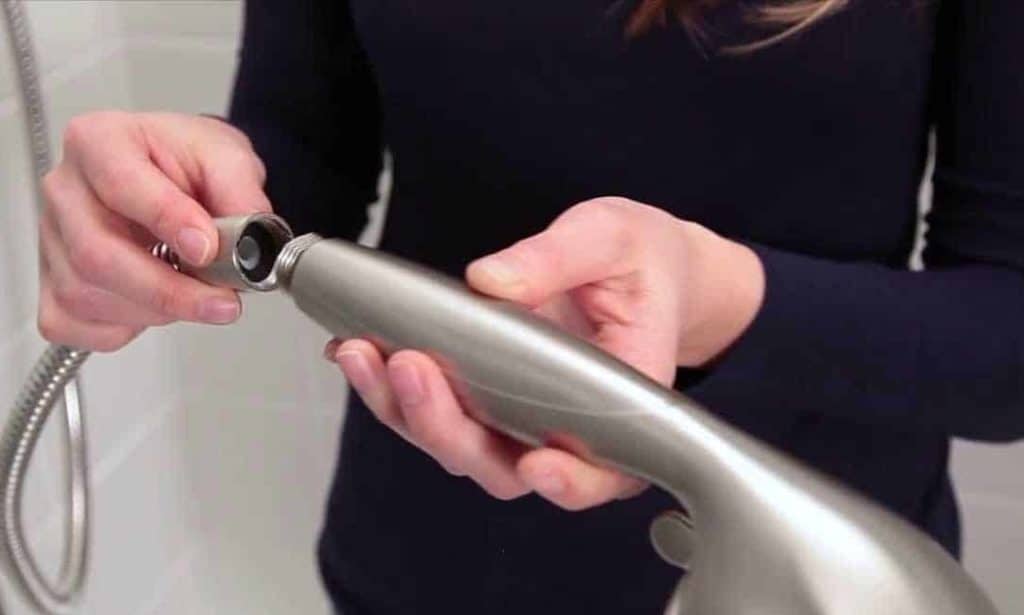
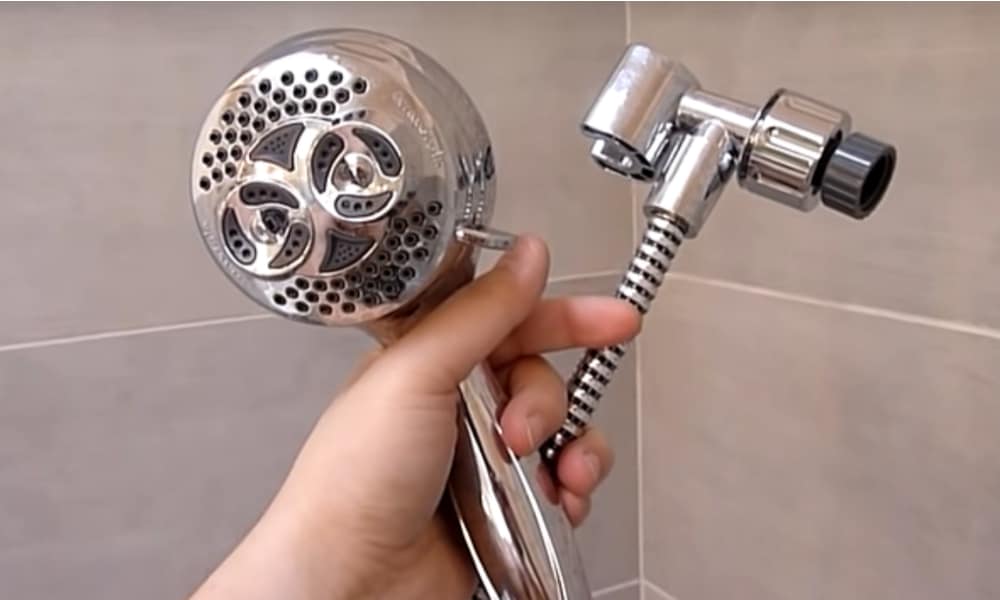
How to Remove a Menstruum Restrictor from a Handheld Shower Head
Handheld shower heads are quite popular with homeowners. The tips below will assistance you lot accept out their water restrictor within minutes.
Footstep 1: Bank check for the Menstruation Restrictor
Wait for the water restrictor on the handheld showerhead by using the owner's manual or manufacturer'due south website.
Ordinarily, the water restrictor is institute inside the holder attached to the shower arm, or the terminate of the handle that connects to the flexible tubing. Nevertheless, the position of the restrictor depends on its make.
Stride 2: Extract the Restrictor
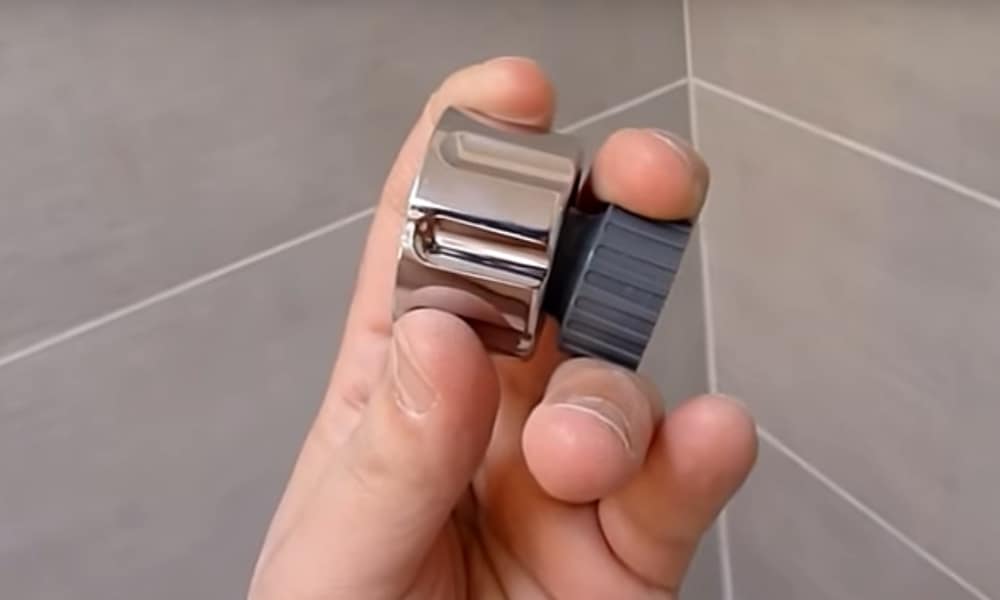
If y'all accept a product with its showerhead at the bottom of the handle, protect the connector nut with a clean rag. Firmly hold the covered nut with adaptable pliers and rotate counterclockwise to take out the handle from the tubing.
Pry the washer out of the handle and filter screen with needle-nose pliers. Pull out the exposed restrictor with a flat caput screwdriver.
If yous have a production with a restrictor within the holder, protect the connector and shower arm with a clean rag. Firmly hold the arm with a pipe wrench while you apply the adaptable pliers to hold the nut. Rotate the nut with clockwise movements until the holders drop from the shower arm.
Move to the end of the holder, then pull out the washer, and filter screen with needle-nose pliers. Remove the restrictor with a flat head screwdriver.
Pace 3: Set up the Shower Head
Return the filter screen and washer to their original position on the fixture. Ensure yous push in the washer with your fingers. Accept out any previous tape which form the linear grooves on the flexible tubing or shower arm.
Cover the threads in fresh tape. Tighten the connector with your easily and wrap the nut with a rag. Secure the nut another quarter plow with an adjustable wrench.
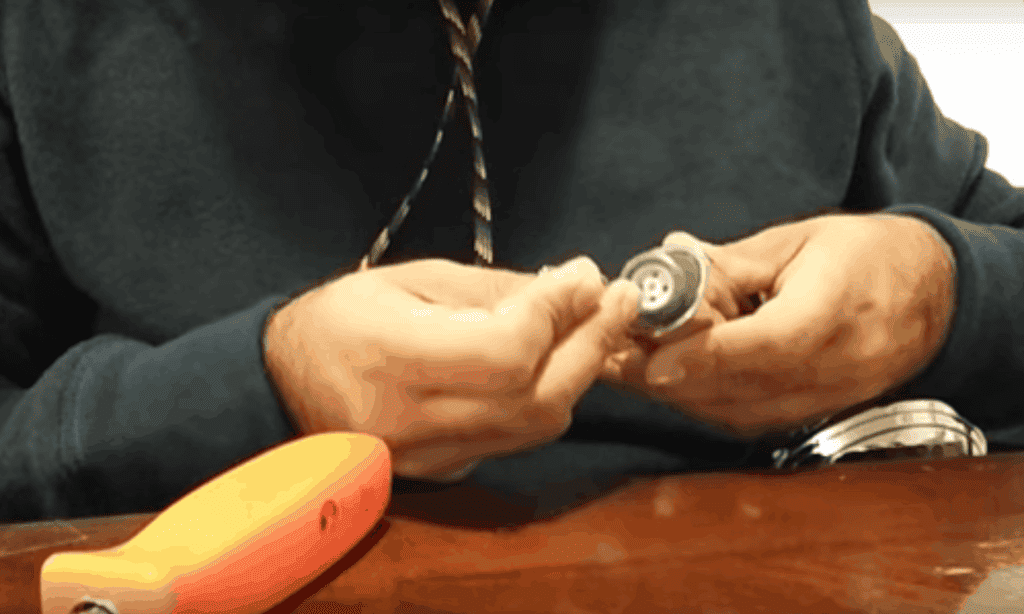
How to Remove a Menstruation Restrictor from a Moen Shower Head
Do you use a Moen showerhead? Here are is an easy way to have out the restrictor in this fixture and savour a strong shower spray.
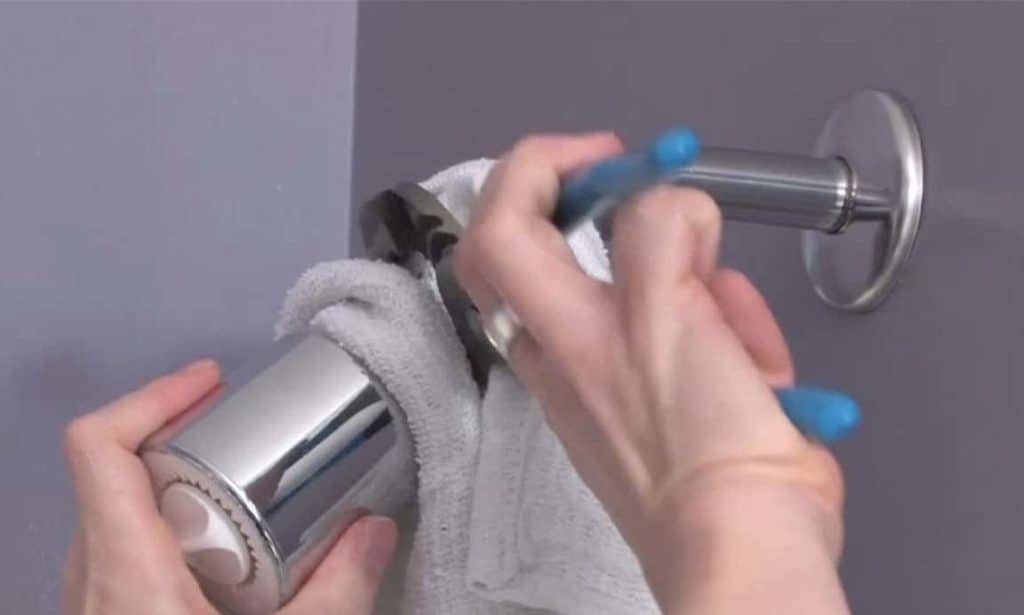
Pace one: Take Out the Shower Head
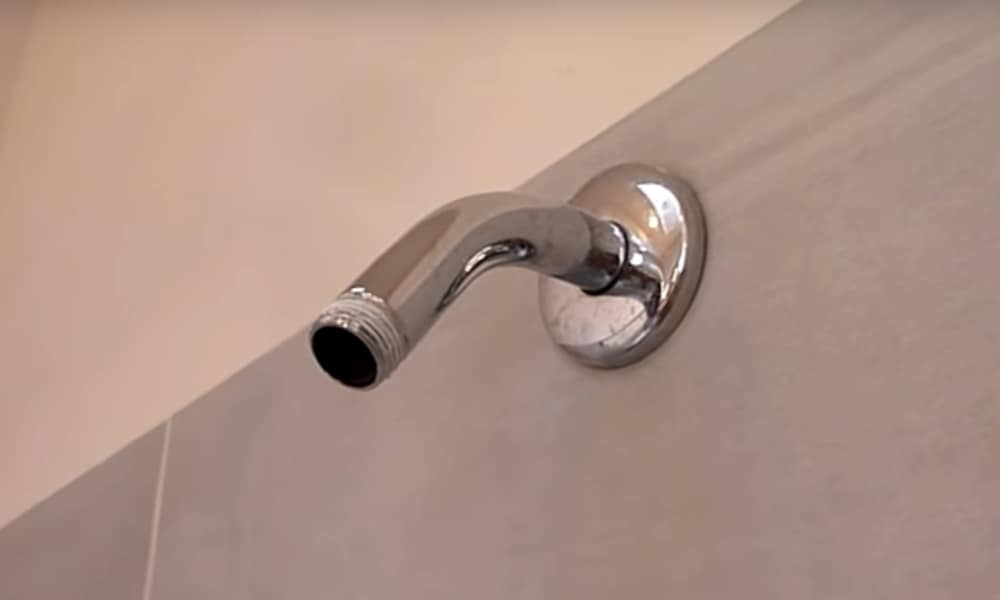
Wrap the showerhead with a clean rag and tighten the jaws with an adaptable wrench. Hold the shower pipe (the part closest to the bathroom wall) with one hand and rotate the showerhead connector with an adjustable wrench.
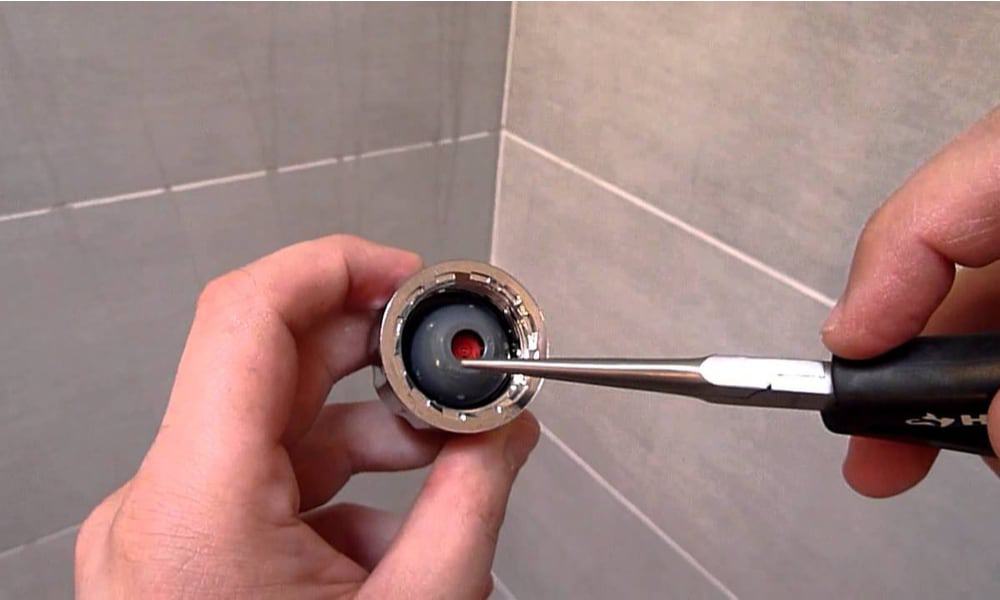
Step ii: Disassemble the Fitting
Extract the prophylactic O ring gasket with your hands to preclude potential impairment to the frail item. Lay your palm on the showerhead and shake gently to remove the screen
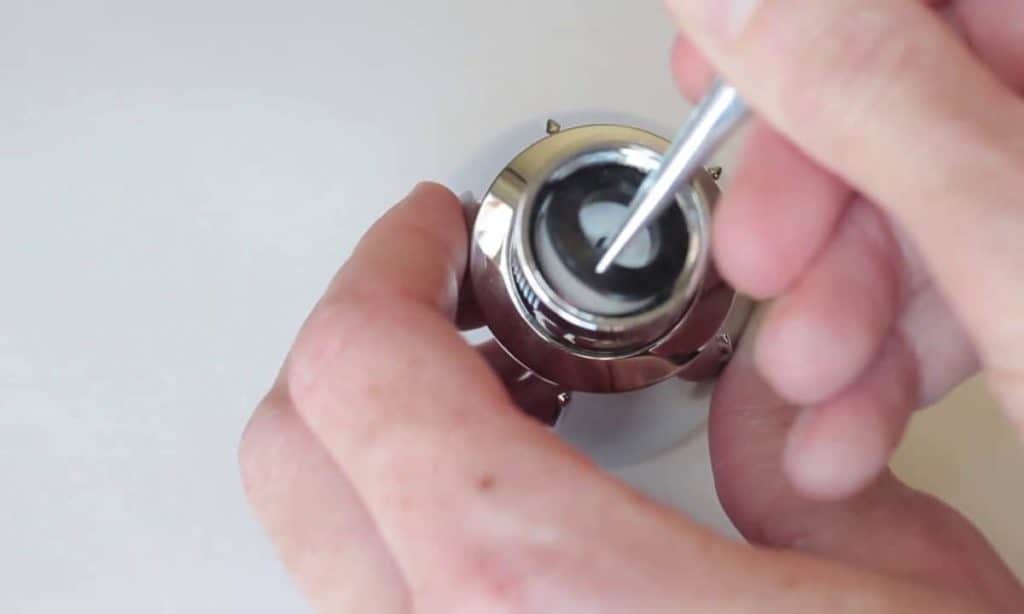
Step 3: Find the Flow Restrictor
Move to the neck of the showerhead and find the flow restrictor. This slice is made from plastic and can exist plant with a screwdriver.
Pace iv: Have Out the Catamenia Restrictor
Gently extract the h2o restrictor from the neck of the fixture. Ensure you utilise minimal pressure when treatment the inner thread of the showerhead to prevent damage.
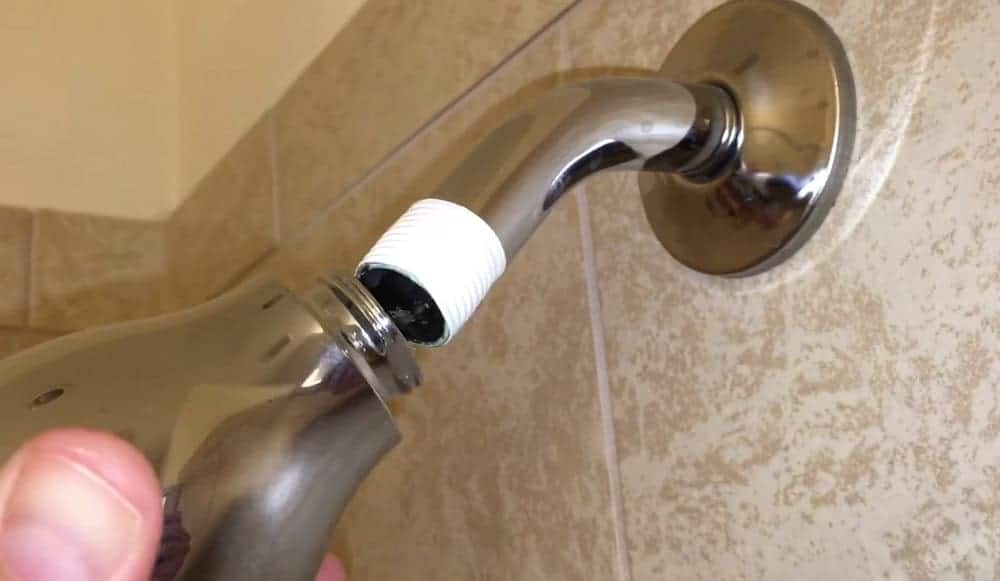
Footstep 5: Reassemble the Parts
Return the screen to the showerhead and set the O ring on it. Call back to continue this assembly tight and secure.
Tightly wrap the new plumber tape around the showerhead. Then, firmly fix the Moen Shower Head to the shower arm with your hands. Finally, wrap the rag around the shower arm and tighten with the connections with the adaptable wrench.
Earlier using our steps to remove menses restrictor from shower head, bleed or close the bath fixtures that supply water.
How to Remove the Flow Restrictor in a Waterpik Showerhead
Like near showerheads on this guide, this fixture uses a flow restrictor to prevent wastage. As a result, you will pay fewer bills to your utility provider.
However, the restrictor tin disturb the shower spray, turning information technology to an annoying weak trickle. To enjoy a potent flow, especially when y'all turn the shower valve, you lot should remove the water restrictor with the following steps.
Step 1: Remove the Shower Head
Extract the Waterpik shower head from the pipe that extends from the wall (showerhead). To do this, use a crescent wrench but ensure the showerhead is wrapped with a rag to avoid scratches.
Pace 2: Extract the Washer
Find and remove the blackness rubber washer on the shower. You can find it betwixt the showerhead and shower arm.
Footstep 3: Excerpt the Flow Restrictor
Accept out the restrictor from the showerhead. Identify a Phillips screwdriver into the star-shaped hole in the spray nozzle. Rotate the small white, dark-green, or pinkish restrictor behind the hole until it's loose.
Stride iv: Protect the Shower Arm
Cover the threads on the arm with plumbers tape. Using this adhesive, y'all will protect the threads from rust when you attach the shower caput to information technology.
Step 5: Reassemble and Reinstall the Bathroom Plumbing equipment
Return the screens and rubber gasket to their positions on the shower arm. Adhere and tighten the showerhead on the shower arm with a crescent wrench. Remember to embrace the showerhead with a rag.
How to Remove a Menstruation Restrictor from a Delta Showerhead
Another blazon of showerhead that uses a menstruation restrictor is the Delta model. Every bit expected, this feature conserves water (at 2.six gallons per minute) and cuts your utility bills.
Although federal police force ensures that companies sell showerheads that have these items, restrictors will reduce the water pressure in your shower.
If you want a shower with a potent spray, you will need to remove the regulator from the bathroom plumbing fixtures. Here is a quick guide to take out the accessory with the tools mentioned above.
Step 1: Protect the Connector
Wrap a clean rag around the chrome connector at the spot where the showerhead extends from the wall. The fabric keeps the fixture from impairment.
Step 2: Unscrew the Showerhead
Tighten an adjustable wrench over the wrapped cloth. Loosen the showerhead with the wrench and take out the fixture from the pipe
Step three: Extract the Washer
Carefully remove the washer from the fixture'south threaded coupler. Ensure y'all employ a pair of needle-nose pliers.
Step four: Remove the Catamenia Restrictor
Firmly concur the opaque nylon menstruum restrictor under the washer with the needle-olfactory organ pliers and pull it out of the fixture.
Stride v: Reassemble and Reinstall the Delta Showerhead
Render the washer to its previous position on the Delta coupler. Printing the item with your thumb to proceed it secure. Replace the Delta connector on the pipe and tighten it downwardly with the adjustable wrench to secure the connection.
How to Increment the Spray of a Peerless Showerhead
If yous have a Peerless showerhead that supplies a trickle of water, cleaning the connectedness, and taking out the water restrictor are easy ways to enhance the flow. Here are several steps to handle this showerhead for low h2o pressure level.
Step 1: Disassemble the Parts
Move to the piping terminate of the showerhead. Carefully remove the rubber gasket and filter screen with a screwdriver. Make clean whatsoever clay or mineral build-up on the screen.
Step two: Loosen and Remove the Period Restrictor
Insert the screwdriver into the pipe end of the showerhead. Press the tool on one border of the plastic water restrictor. Place the tool under the flow restrictor and pull gently to remove information technology from the opening.
Stride iii: Reassemble and Reinstall the ShowerHead
Supercede all the removed parts mentioned above to their original positions. Finally, reassemble the showerhead.
If your showerhead does not have a h2o restrictor, there is no need to worry as some models do not come with i. If this is the case, you tin enjoy improve h2o pressure past using a showerhead for this purpose.
Wrap Up
Near shower heads accept flow restrictors to control the amount of water that flows from them. They even play a major role in reducing the utility bills of your home. However, they can lead to cases of low h2o pressure in some bathrooms.
If y'all fall into this category, use this guide to extract your showerhead; detach information technology; accept out the period restrictor, and reinstall the bathroom fixture.
I promise you lot find this guide useful for various types of showerheads. If you have whatever questions, feel free to ask them in the box below.
Source: https://www.sunrisespecialty.com/how-to-remove-flow-restrictor-from-shower-head
0 Response to "How To Remove Flow Restrictor From Moen Shower Head"
Post a Comment